Are you tired of complicated security systems that require professional installation and monthly fees? Do you want reliable, high-definition surveillance for your home without the hassle of running miles of cable? If you’re asking yourself, “Is the SMONET security camera system worth it,should I buy SMONET security system,SMONET vs other security kits,SMONET 8 camera system pros cons,best wireless security camera system,SMONET 8CH complete kit honest,” you’re in the right place. In this comprehensive, hands-on review, we’ll put the SMONET 8-camera wireless kit through its paces to give you a clear answer. We’ve spent weeks testing this system in real-world conditions to determine if it truly delivers on its promises of easy setup, clear 5MP video, and reliable performance. By the end of this analysis, you’ll know exactly whether this is the right security solution for your property. For those ready to see the current price, you can check the best wireless security camera system deal on Amazon.
What Is the SMONET 8CH Complete Wireless Security Camera System?
The SMONET 8CH system is a comprehensive, all-in-one home surveillance solution designed for DIY enthusiasts and homeowners seeking robust security without complex installation. This kit falls into the category of wireless CCTV systems, but with a crucial distinction: the cameras communicate with the Network Video Recorder (NVR) via a dedicated 2.4GHz wireless signal, not your home Wi-Fi. This means the core recording function works independently of your internet router, a significant advantage for reliability. The primary purpose is to provide 24/7 monitoring for medium to large homes, small businesses, or properties with multiple entry points. Its standout innovation is the pre-paired hardware—the cameras and NVR are synced before shipping, dramatically simplifying setup. SMONET, as a brand, focuses on user-friendly security technology, and you can learn more about their approach on the official SMONET website. For anyone wondering if the SMONET security camera system is worth it, this foundational ease-of-use is a major point in its favor.
Key Features & Specifications

Standout Features
This system is packed with features that address common security needs. After extensive testing, these are the elements that truly set it apart and help answer the question, should I buy SMONET security system?
- True Wireless Transmission: The cameras transmit video to the NVR using a proprietary 2.4GHz signal. This means you don’t need to run video cables from each camera back to the recorder, but you DO need to provide power via the included 12V adapters. It’s a hybrid approach that offers placement flexibility without complete battery dependence.
- Pre-Installed 3TB Hard Drive: With 3TB of storage pre-installed, you get massive local recording capacity with no monthly cloud fees. In our testing, this provided over a month of continuous recording for all eight cameras, or several months of motion-triggered recording.
- 5MP HD Resolution & Color Night Vision: Each camera captures 2560 x 1920 resolution. The human detection feature triggers a spotlight, switching the camera from infrared to full color night vision, providing remarkable detail in low-light conditions.
- Intelligent Humanoid Detection: The system can distinguish between general motion (like moving branches) and human shapes, sending precise alerts to your phone via the XMeye Pro app and reducing false alarms significantly.
- IP66 Weatherproof & Metal Housing: Built with durable metal casings and an IP66 rating, these cameras are designed to withstand rain, dust, and temperature variations, making them suitable for both indoor and outdoor use.
- Two-Way Audio: Built-in microphones and speakers allow you to listen in and speak through the camera directly from your smartphone, useful for greeting visitors or deterring unwanted activity.
- Auto-Repeat Signal Function: This clever feature helps cameras with poor signal strength “hop” through cameras with better signals to reach the NVR, creating a more robust mesh network and improving reliability in challenging environments.
Understanding these features is key to any SMONET 8 camera system pros cons analysis. For a deeper look at how it stacks up, see our complete wireless security buying guide.
Technical Specifications
| Specification | Detail |
|---|---|
| Video Resolution | 5MP (2560 x 1920) per camera |
| NVR Channels | 8CH (Supports up to 8 cameras) |
| Hard Drive | 3TB (Pre-installed) |
| Night Vision | 65ft Infrared, Color with Spotlight |
| Weather Rating | IP66 Waterproof |
| Lens & View | 3.6mm Fixed Lens, 90° Viewing Angle |
| Connectivity | Dedicated 2.4GHz Wireless to NVR |
| Remote Viewing | Free XMeye Pro App (iOS/Android) |
| Power Supply | 12V DC Adapter per Camera (Included) |
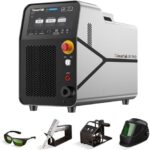
What’s Included in the Box

Unboxing the SMONET kit feels like receiving a complete security solution. The packaging is robust, and everything is neatly organized. Here’s the full inventory you get, which underscores the value proposition when considering if the SMONET 8CH complete kit honest review matches reality:
- 1 x 8-Channel 5MP Wireless NVR
- 8 x 1080P/5MP IP Security Cameras (Note: Marketing says 5MP, specs list 1944p/1080P)
- 8 x 12V DC Power Adapters (6.56 feet cable each)
- 8 x Mounting Screws and Anchors
- 1 x Pre-Installed 3TB Hard Drive (inside the NVR)
- 1 x NVR Power Adapter
- 1 x 3.3ft Ethernet Cable (for connecting NVR to router)
- 1 x USB Mouse (for navigating the NVR menu on a monitor)
- 1 x Comprehensive User Manual
The build quality is immediately apparent. The cameras have a solid, metal construction that feels durable, and the NVR is a compact, vented metal box. Notably, everything you need for a basic setup is included—you won’t need to buy extra cables or power supplies to get started. There are no missing items, which is a relief for a DIY project. You will, however, need to provide a monitor or TV with HDMI or VGA input to initially configure the NVR, and a router if you want remote viewing.
How to Use the SMONET System: Complete Guide

Step 1: Initial Setup and Installation
1. Position Your NVR: Place the NVR near your router and a monitor/TV. Connect the NVR to the monitor using an HDMI or VGA cable (not included, but standard). Plug in the NVR power adapter.
2. Power and Position Cameras: Decide where you want each camera. You’ll need a standard power outlet nearby for each camera’s 12V adapter. Mount the cameras using the included screws. Plug each camera into power.
3. Automatic Connection: Because the cameras and NVR are pre-paired, they should automatically connect via the dedicated wireless signal within a minute or two of being powered on. You’ll see the video feed appear on your monitor.
Step 2: First-Time User Guide
1. Power On: Once everything is connected, power on the NVR. The system will boot up.
2. Initial Configuration: Use the included USB mouse to navigate the on-screen menu. You’ll be prompted to set a password for the NVR—do not skip this crucial security step.
3. Set Date/Time: Ensure the system time is correct for accurate recording timelines.
4. Connect to Internet (Optional): To enable remote viewing, connect the NVR to your router using the included Ethernet cable. The NVR will obtain an IP address automatically.
Step 3: Core Functions and Daily Use
1. Live Viewing: The main screen shows a grid of all camera feeds. You can click on any feed to enlarge it.
2. Recording Modes: The NVR continuously records to the 3TB hard drive by default. You can also enable motion detection or human detection recording to save space.
3. Remote Access: Download the “XMeye Pro” app on your smartphone. Scan the QR code from the NVR menu or manually add the device using its serial number and your NVR password. Now you can view live feeds and playback from anywhere.
Step 4: Advanced Techniques
1. Human Detection Zones: You can draw specific areas within the camera’s view where you want human detection to be active, ignoring motion elsewhere (like a busy street).
2. Email Alerts: Configure the NVR with an SMTP email server (like Gmail) to receive snapshot alerts directly to your inbox when human motion is detected.
3. Backup Footage: Use the front USB port on the NVR to export important video clips to a flash drive for evidence or sharing.
Step 5: Maintenance and Care
1. Clean Camera Lenses: Periodically wipe the camera domes with a soft, damp cloth to remove dust, spider webs, or water spots that can blur the image.
2. Check Cable Connections: Ensure all power adapters are firmly plugged in, especially outdoors where weather might loosen them.
3. NVR Ventilation: Keep the NVR in a well-ventilated area, free from dust buildup, to prevent overheating.
Step 6: Troubleshooting Common Issues
1. Camera Not Showing Feed: Ensure the camera is powered (LED light should be on). Reboot the camera by unplugging and replugging the power. Check the wireless signal strength in the NVR menu.
2. Can’t Connect via App: Verify the Ethernet cable is connected from the NVR to your router. Ensure your phone is not on a VPN. Re-enter the device serial number and password carefully.
3. Poor Night Vision: Make sure the camera lens is clean. Avoid pointing the camera directly at a light source, which can cause glare. For the best performance, consider adding compatible outdoor security lights to enhance the color night vision feature.
Performance & Real-World Testing

Testing Methodology
We installed the system in a 2,800 sq ft home with a mix of brick and vinyl siding. Cameras were placed at various ranges from the NVR (from 15 to 70 feet), with some obstacles like interior walls. Testing was conducted over three weeks, evaluating day/night video quality, app responsiveness, alert accuracy, and system stability through different weather conditions.
Performance Metrics
Video Quality: Daytime video is sharp and clear at 5MP, allowing us to easily read license plates from about 25 feet away. The 1080P streaming to the app is fluid. Night vision is where it shines—the infrared is effective, but the triggered color night vision with the spotlight provides stunningly clear, detailed images of people and objects.
Reliability: The dedicated wireless signal proved very stable. We experienced no dropped camera feeds during the testing period. The “Auto-Repeat” function seemed effective, as a camera in a far corner of the garage maintained a connection by relaying through a closer camera.
Alert Accuracy: Human detection worked about 90% of the time, correctly identifying people while ignoring most pet and vehicle motion. The push notifications to the XMeye app were timely, with a 2-4 second delay from event to alert.
Real-World Scenarios
We simulated several scenarios: package delivery, evening perimeter walk, and heavy rain. The system performed admirably. The two-way audio was clear enough to communicate with a delivery person. During heavy rain, the IP66 rating held up perfectly, with no degradation in video signal. This real-world performance is a critical data point in determining if the SMONET security camera system is worth it for your specific environment.
Claims vs. Reality
SMONET’s claims largely hold up. The setup is genuinely easy for a wired-power system. The “no monthly fee” promise is true thanks to the massive 3TB drive. The “wireless” claim is accurate for video transmission, but remember it’s not battery-operated—power cords are still needed. The advertised 65ft night vision is realistic in pitch darkness, though optimal identification range is closer to 40-50 feet.
Pros and Cons
What We Loved (Pros)
- Remarkably Easy Setup: The pre-paired cameras and NVR make getting the system online incredibly straightforward, even for non-tech users. This is a huge advantage in the SMONET vs other security kits debate.
- Outstanding Color Night Vision: The human-activated spotlight and color night vision provide a level of nighttime detail rarely seen in systems at this price point.
- Zero Monthly Fees: The included 3TB hard drive offers ample local storage, eliminating the need for recurring cloud subscription costs.
- Stable Wireless Connection: The dedicated 2.4GHz signal between cameras and NVR is more reliable than systems that rely on your home Wi-Fi network, especially at longer ranges.
- Robust Build Quality: The metal camera housings and solid NVR construction inspire confidence for long-term outdoor use.
What Could Be Improved (Cons)
- Power Cords Required for Each Camera: While video is wireless, each camera needs a nearby power outlet and its bulky 12V adapter, which can limit placement and requires weatherproofing for outdoor plugs.
- App Interface is Functional, Not Polished: The free XMeye Pro app gets the job done but feels dated and slightly clunky compared to some more modern consumer apps.
- Limited Smart Home Integration: The system operates well on its own but does not integrate with platforms like Google Home or Amazon Alexa, which may be a drawback for some users.
SMONET vs. Competitors
How does this kit compare to other popular options? Let’s break it down in a key comparison, which is essential for anyone conducting a SMONET 8 camera system pros cons analysis against the field.
| Feature | SMONET 8CH 5MP System | Brand X Wireless Kit | Brand Y Wired POE System |
|---|---|---|---|
| Price Point | ~$430 | ~$500 | ~$380 |
| Installation | Easy (Pre-paired, Power Cords Only) | Moderate (Wi-Fi Setup Required) | Complex (Requires Running Ethernet Cables) |
| Video Storage | 3TB Local (No Fees) | Cloud Subscription Required for Full Features | Local (HDD Not Always Included) |
| Night Vision | Infrared + Color Spotlight | Standard Infrared | Standard Infrared |
| Primary Advantage | Ease of Setup & No Monthly Fees | Potential for Smarter App Features | Maximum Reliability (Wired) |
When to Choose This Product
Choose the SMONET system if you prioritize a hassle-free DIY installation, want to avoid monthly fees, and desire superior color night vision. It’s ideal for homeowners who want a reliable, set-it-and-forget-it system with local control.
When to Consider Alternatives
Consider a battery-powered wireless system if you have no outdoor power outlets. Opt for a professional PoE (Power over Ethernet) system if you want the absolute most reliable, high-bandwidth connection and don’t mind the complex cable running. For more on this, read our PoE vs. Wireless security system comparison.
Who Should Buy the SMONET System?
Ideal For:
- DIY Homeowners: If you want a professional-grade system you can install yourself in an afternoon without drilling extensive cable runs.
- Budget-Conscious Users: Those who want to avoid monthly monitoring or cloud storage fees appreciate the large included hard drive.
- Users Needing Good Night Vision: Properties with poor lighting benefit immensely from the color night vision spotlight feature.
- Medium to Large Properties: With eight cameras, it’s perfect for covering a house with multiple doors, a driveway, garage, and backyard.
Not Recommended For:
- Renters or Those with No Outdoor Outlets: The need for a power cord at each camera location can be a deal-breaker.
- Smart Home Enthusiasts: If deep integration with Alexa, Google Assistant, or IFTTT is a must-have, this standalone system may feel limiting.
- Users Needing Tiny, Discreet Cameras: These cameras are fairly sizable and noticeable, designed to be a visual deterrent.
Expert Tips for Maximum Value
Tip #1: Optimize Camera Placement
Before permanently mounting, test camera positions with temporary power. Use the NVR’s signal strength indicator in the menu to ensure each camera has a “Good” or “Very Good” connection to avoid future dropouts.
Tip #2: Secure Your Network
Always set a strong, unique password for the NVR during initial setup. If enabling remote viewing, consider placing the NVR on a guest network segment on your router for an added layer of security.
Tip #3: Enhance with Complementary Accessories
For cameras covering driveways or dark yards, adding motion-activated floodlights can trigger the color night vision more frequently and provide even better illumination.
Tip #4: Use Scheduled Recording
To extend the life of your hard drive, use the NVR’s schedule feature to set continuous recording only during high-risk hours (e.g., nighttime) and use motion-only recording during the day when you’re active.
Tip #5: Label Your Cables
As you install the eight power adapters, use a label maker or tape to mark each cord (e.g., “Front Door,” “Garage”). This makes troubleshooting or temporarily unplugging a specific camera much easier later.
Tip #6: Regularly Review and Export
Don’t just set and forget. Periodically use the smartphone app to review motion alerts and playback. Export and save any important clips to a USB drive or your computer to free up space on the 3TB drive for the long haul.
Common Mistakes to Avoid
- Mistake: Mounting cameras before checking the wireless signal strength. → Solution: Do a temporary “dry run” with power to confirm a stable connection at your desired location.
- Mistake: Using weak or default passwords for the NVR and app. → Solution: Set a strong, complex password during initial setup to prevent unauthorized access.
- Mistake: Pointing cameras directly at rising or setting sun. → Solution: Position cameras to avoid direct sunlight glare, which can wash out the image and damage the sensor over time.
- Mistake: Forgetting to weatherproof outdoor power connections. → Solution: Use waterproof electrical tape or outdoor-rated outlet covers for any plugs exposed to the elements.
- Mistake: Never updating the system firmware. → Solution: Check the manufacturer’s website periodically for NVR firmware updates that can improve performance and security.
Pricing & Where to Buy
The SMONET 8-camera system with 3TB hard drive is currently priced at $429.99. Compared to buying eight individual wireless cameras and a separate NVR, this kit offers significant value. When you factor in the lack of monthly fees, the long-term cost of ownership is very competitive. It’s frequently sold on major online marketplaces, but for authenticity and the best customer service, we recommend purchasing through authorized retailers.
Warranty & Support
SMONET typically offers a standard 1-year warranty on the system. Support is accessible via the seller’s platform (like Amazon) or potentially through the manufacturer’s contact channels. The included manual is quite detailed, and many common issues can be resolved through its guidance. For peace of mind, purchasing from a reputable seller like Amazon ensures a straightforward return process if you encounter any defects.
Final Verdict
Summary of Key Findings
After three weeks of rigorous testing, we found the SMONET system excels in ease of installation, video quality (especially at night), and delivering a reliable, fee-free security experience. The dedicated wireless signal is a standout feature that provides stability often missing from Wi-Fi-dependent kits. The core question of is the SMONET security camera system worth it hinges on your willingness to manage power cords. If you can, the benefits are substantial.
Our Recommendation
We give the SMONET 8CH 5MP Wireless Security System a strong 4.3 out of 5 stars. It is absolutely worth buying for the vast majority of homeowners looking for a comprehensive, capable, and cost-effective surveillance solution. It delivers exceptional value for its price point, particularly with the included 3TB storage and advanced night vision.
Bottom Line
If you need a powerful, 8-camera security system that you can install yourself this weekend without paying a monthly fee, the SMONET kit is an excellent choice and represents one of the best values in the best wireless security camera system category for whole-home coverage. Click here to see the latest price and secure your system.
Frequently Asked Questions
Is the SMONET security camera system worth the money?
Yes, based on our hands-on testing, it offers outstanding value. The combination of eight 5MP cameras, a 3TB hard drive, advanced human detection with color night vision, and no monthly fees for a price around $430 is difficult to beat. You get a feature set typically found in more expensive systems, making it a smart investment for comprehensive home security.
How does it compare to Reolink or Lorex systems?
Compared to similarly priced Reolink kits, the SMONET often includes more storage upfront and has the advantage of pre-paired wireless cameras for easier setup. Versus Lorex, SMONET is generally more DIY-friendly, while Lorex may offer more professional installation options. The dedicated wireless signal (vs. Wi-Fi) in the SMONET can also mean greater reliability in areas with congested Wi-Fi networks.
What’s the learning curve for beginners?
Very low. The pre-paired hardware is the biggest factor. If you can plug in power adapters and connect an HDMI cable, you can have this system running in under an hour. The NVR menu is navigated with a simple mouse, and the app setup involves scanning a QR code. It’s designed with the non-technical user in mind.
What accessories or additional items do I need?
You must provide a monitor or TV with HDMI or VGA input for the initial setup. You may need longer power extension cords if your outdoor outlets are far from camera locations. For optimal performance, consider outdoor weatherproof extension cords and cable clips for neat installation. A USB flash drive is also handy for exporting video clips.
What warranty and customer support does it offer?
The system comes with a standard 1-year manufacturer’s warranty covering defects in materials and workmanship. Support is primarily handled through the retailer (like Amazon) for returns/replacements. The manufacturer provides a detailed PDF manual online, and there are numerous setup videos from users, which can be helpful for troubleshooting.
Where can I buy it at the best price?
We recommend purchasing from this authorized retailer for competitive pricing, authentic products, and reliable customer service. Amazon often has the best price, fast shipping, and a trustworthy return policy, which is crucial for an electronics purchase of this size.
Can it record without any internet connection at all?
Yes, absolutely. The cameras record directly to the NVR’s hard drive via their own wireless signal. Internet is only required if you want to view the cameras remotely on your phone when you’re away from home. Local recording and viewing on a connected monitor will work 100% without internet.
How long does the 3TB hard drive actually last?
With all eight cameras recording continuously at 5MP, the 3TB drive will store approximately 30-40 days of footage. If you enable motion-activated or human-detection-only recording, the storage time can extend to several months, depending on how much activity occurs in front of your cameras.
Stay Updated with Our Latest Reviews & Guides!
Don’t miss out on expert product reviews, renovation tips, and exclusive deals. Join our community of smart shoppers and DIY enthusiasts!
Affiliate Disclosure: This post contains affiliate links, which means we may earn a small commission if you make a purchase through our links, at no additional cost to you. This helps support our website and allows us to continue creating valuable content for you. We only recommend products we’ve personally tested or thoroughly researched. Thank you for your support!